Installing a power supply (PSU) in your PC is a crucial step when building or upgrading your computer. This guide is here to install the process and make it an enjoyable
experience. We’ll provide you with easy-to-follow steps, sprinkled with a Pictorial Guide to keep things light-hearted.
So, grab your screwdriver, channel your inner tech guru, and let’s power up your PC!
Things to Consider before installing a new PSU
Before we Dive into the the installation of your new PSU please make sure to match all these things
this is important for you to make a choice and make things easier for you to Install a New PSU
| Considerations for Choosing a Power Supply for Your PC |
|---|
| Factor | What to Check | Why it Matters |
|---|---|---|
| Form Factor | Check if it fits your PC case. | To make sure it physically fits inside. |
| Wattage | Ensure it has enough power for your parts. | So all your computer parts can work well. |
| Efficiency | Look at its efficiency rating. | Higher rating means it’s more energy-efficient. |
| Modularity | Decide if you want modular cables. | Makes cable management and airflow better. |
| Warranty | Check for a good warranty. | Protects you if it breaks down unexpectedly. |
| Brand | Research the brand’s reputation. | Some brands are more trusted than others. |
| Price | Set your budget before buying. | Helps you stay within your spending limits. |
| Features | Consider any extra features you want. | Like cool lighting or fan control. |
Before you get a new power supply for your computer, there are some things you should think about:
Size: Check if it fits in your computer case.
Power: Make sure it gives enough power for your computer parts to work.
Efficiency: See if it saves energy and doesn’t get too hot.
Cables: Decide if you want to be able to unplug extra cables.
Warranty: Make sure it has a good promise in case it breaks.
Brand: Look at what people say about the company that makes it.
Money: Decide how much you want to spend.
Extras: Think about any cool things you want it to have.
How To Install Power Supply – Step by Step
Are you ready to give your computer a boost of power? Installing a power supply (PSU) is like giving your computer a tasty battery snack.
We’ll take you through this fun adventure, step by step, with ease. So, grab your imaginary computer tool belt, and let’s dive in!
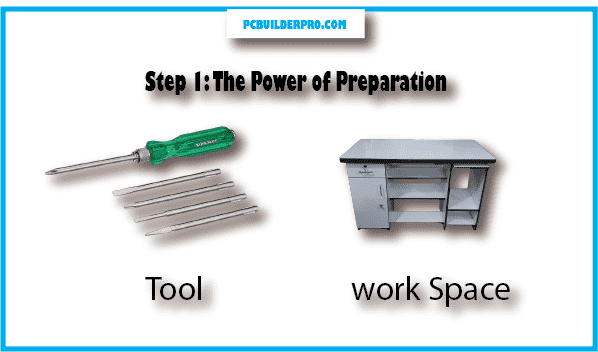
Step 1: The Power of Preparation

Before we jump into the action, let’s get prepared like a superhero before saving the day!
Gather Your Tools: Grab your trusty screwdriver, like a knight with a sword, and a power supply that suits your computer’s needs.
You don’t want a PSU that’s too weak or too strong; just the right size, like Goldilocks’ porridge.
Find a Cool Workspace: Pick a spot with lots of air (computers need to breathe, too) and enough space for your computer and your tools. Your kitchen table will do just fine!
Step 2: Power off: Power Supply and Switch Board

Now, before we start, we have to make sure you’re safe from any shocking surprises.
- Power Down: Turn off your computer like you’re saying goodnight to a teddy bear. Unplug all the cords from your PC. Remember, we’re avoiding shocks, not giving them!
- No Static Zaps: Ever tried to touch a balloon to your hair? That’s static! Wear an anti-static wrist strap if you have one. It’s like wearing a superhero cape but for your wrists.
Step 3: Remove Old Power Supply

Out with the old, in with the new! Time to say goodbye to your old power supply.
- Open Sesame: Use your screwdriver to open your computer’s case. It’s like opening a treasure chest, but instead of gold, you’ll find computer parts!
- Unplug and Remove: Disconnect all the cables from your old PSU, like untying shoelaces. Then, gently unscrew and take out the old PSU. It’s retiring to a beach somewhere.
Step 4: Install New Power Supply

Introducing your new sidekick, the power supply! Let’s give it a warm welcome.
- Mount Your Hero: Carefully put your new PSU in the same spot as the old one. Screw it in like you’re securing a precious gem in a treasure chest.
- Connect the Cables: Attach the power cables to your motherboard and other computer parts. Make sure they’re snug, like a cozy blanket on a chilly night.
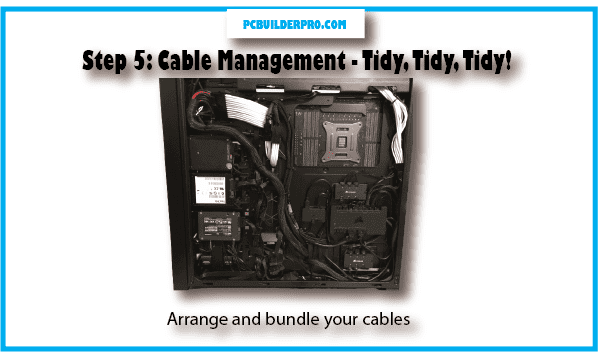
Step 5: Cable Management – Tidy, Tidy, Tidy!

Time to organize those cables so your computer looks as neat as a library bookshelf.
- Tame the Cable Beast: Arrange and bundle your cables neatly. You can use twisty ties or Velcro straps for this job. It’s like giving your computer a fancy hairstyle!
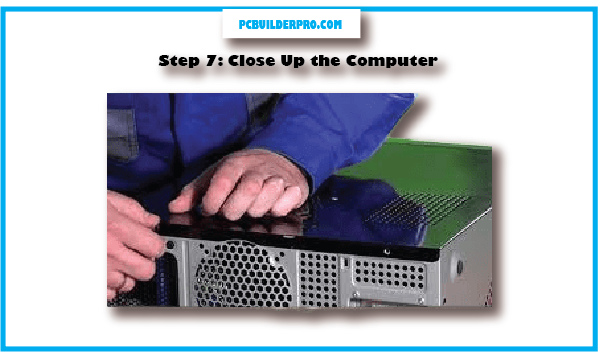
Step 6: Close The PC Case

Let’s wrap this up like a magician finishing a magic trick.
- Case Closed: Carefully close your computer case, making sure everything lines up. Secure it with screws like a secret treasure chest. Ta-da!
Step 7: Power On – Let There Be Light (and Funny Cats)!

Time for the grand finale! Let’s turn on the computer and see if it purrs like a content kitty.
- Plug-In and Power-Up: Reconnect all the cables you unplugged earlier, like connecting the dots in a fun picture. Plug in your PC and turn it on. Look for those blinking lights and listen for any strange sounds (hopefully, not meowing).
What to Do After Installing a New PSU
Hey, tech champs! You’ve installed your shiny new power supply (PSU), but now, let’s make sure it’s all working like a charm. We’re going to keep it super simple and clear. Ready? Here we go!
| Steps to Check Your New Power Supply |
|---|
| Step | What to Do | Why It’s Important |
|---|---|---|
| 1 | Check Cables | Make sure all cables are plugged in. |
| 2 | Flip the Switch | Turn on the power supply switch. |
| 3 | Test the System | Start your PC and see if it works. |
| 4 | Troubleshoot If Needed | If it’s not working, follow the manual. |
Now, let’s break it down:
- Step 1: Check Cables Make sure all the cables from your PSU are snugly connected to the motherboard and other parts. Think of it like making sure all the pieces of a puzzle are in place.
- Step 2: Flip the Switch Find the switch at the back of your PSU and flip it to the “on” position. It’s like turning on the lights in a room.
- Step 3: Test the System Press the power button on your PC and see if it starts up like a champ. If it’s not behaving, double-check those cables one more time. If it’s still acting up, don’t worry, your PSU manual might have superhero-like troubleshooting tips.
- Step 4: Troubleshoot If Needed If your computer is still not behaving, don’t sweat it. Refer to your PSU manual for some helpful hints. It’s like having a secret guide to solving mysteries.
Additional Guide for a Happy PC:
Cover Up: Put the computer case panels back on and secure them with screws. It’s like putting a shield around your PC to keep dust and harm away.
Cable Organization: Once your case is all closed up, tidy up those cables inside. Neat cables help your PC breathe and look cool, just like a well-combed hairstyle.
Temperature Check: Keep an eye on your PSU and other parts’ temperature. If things get too hot, it’s like feeling a fever – not good. Monitoring can help spot problems early.
Note that, if you’re ever in doubt about your new PSU or your PC’s behavior, it’s superhero time to call in a professional technician. They’re the experts who can save the day!
PC Won’t start after installing new Power Supply (Solutions)
if you encounter any problems after installing a new PSU to your Computer then use all these simple methods that can easily fix all the possible issues and errors in just a simple tricks and Guides
| Problem | Possible Solutions |
|---|---|
| PC won’t start after new PSU | Check all cables are connected properly. |
| Disconnect extra components, and try starting with minimum setup. | |
| Ensure no components are loose or not seated correctly. | |
| Test the new power supply for faults. | |
| Look for any visible damage on the motherboard. | |
| Listen for beeping sounds or check LED indicators. | |
| Verify power button connections. | |
| Disconnect extra components, try starting with minimum setup. | |
| Ensure the power supply can handle your PC’s needs. | |
| Seek help from a professional if the problem persists. |
I hope this table makes it easier to understand the steps to troubleshoot your PC’s issue after installing a new power supply.
How to Keep Your New Power Supply Safe After Installation
A power supply is like the unsung hero of your computer, quietly delivering the juice needed to keep all your components humming along. To keep your system running smoothly,
we’ve got some power-packed tips on how to safeguard your new power supply after installation. But, hey, we promise to make it as fun as possible!
| Tip | Why It Matters |
|---|---|
| 1. Cool as a Cucumber | A well-ventilated case keeps your PSU chill, preventing overheating meltdowns. Just like us on a hot summer day! |
| 2. Dust Busters | Enter the trusty surge protector, your PSU’s shield against power surges. It’s like a superhero cape but for your computer. |
| 3. Watt’s the Deal? | Don’t overburden your PSU – give it enough wattage love to support all your PC pals. You don’t expect a single hamster to power a whole wheel, do you? |
| 4. Surge Safeguard | Enter the trusty surge protector, your PSU’s shield against power surges. It’s like a superhero cape, but for your computer. |
| 5. Temperature Tango | Keep an eye on your PSU’s temperature; it shouldn’t have hot flashes. Monitoring tools are your best friend here. |
Additional Tips with a Touch of Humor:
Avoid ‘Bottom Blues’: Just like you’d avoid sitting on a hot car seat, don’t place your PSU at the bottom of the case. It’ll thank you for the fresh air.
Gentle with Screws: Overtightening screws is a no-no; you wouldn’t squish your sandwich to fit in your lunchbox, right? Be gentle with those screws.
Cable Ballet: When connecting cables, imagine your PSU doing a graceful ballet. Be careful not to trip it up.
Call in the Pros: If all else fails and you’re about as handy as a cat trying to juggle, call a qualified technician. They’re the lifeguards of the tech world!
Is it safe for me to install a power supply myself, or should I call a professional?
If you know your way around gadgets and can follow a guide, you can try putting in a power supply by yourself. But if you’re not too sure or get stuck at any point, it’s best to get a pro to do it. They know exactly what to do, and it’s safer that way.
What are the different types of power supplies (PSU) available?
Power supplies for computers come in a few main types:
Standard PSUs: These have all their wires fixed and can’t be removed.
Modular PSUs: You can take off the wires you don’t need, which helps keep things tidy and cool inside your computer.
Semi-modular PSUs: These are a bit of both, with some wires fixed and others you can remove.
How do I know what wattage PSU I need for my computer build?
The power your computer needs depends on what’s inside it. If you’ve got parts that need a lot of juice, like a fancy graphics card or a powerful processor, you’ll need a power supply
that can handle that. You can check what the makers of your parts suggest or use a website that calculates it for you.
What’s the difference between a modular and a non-modular PSU?
A modular power supply lets you unplug wires you’re not using, which can help air move better inside your computer. A non-modular one has all its wires attached all the time.
Are there any compatibility factors to consider when choosing a PSU?
Yep, you’ve got to think about:
Form factor: Power supplies come in different shapes and sizes. Pick one that fits where it’s supposed to go on your computer.
Connectors: Make sure it has the right plugs for your computer’s parts, like the motherboard and hard drive.
Installation Process: What tools will I need to install a new power supply? Usually, just a screwdriver to open up your computer and screw in the power supply.
Do I need to turn off and unplug my computer before starting the installation?
Yes, definitely! Make sure everything’s off and unplugged so you don’t get a shock or hurt your computer.
How do I remove the old power supply from my computer case?
Unscrew it, unplug all the wires carefully, and then take it out of the case.
Where should I mount the new power supply in the case?
It usually goes at the back, with the fan pointing out to blow hot air away. Check your computer’s manual to see exactly where it should go.
How do I connect the power supply cables to the motherboard?
There’s a big plug with lots of pins that goes into a slot on the motherboard. Make sure it fits right and all the pins are in place. Your motherboard might also need some extra power plugs depending on what it is.
How can I identify the different power supply cables for motherboards, storage drives, and graphics cards?
Power supply units (PSUs) come with various cables that connect to different parts of your computer. Each cable is unique and usually has a label or a distinct shape that fits only into
its corresponding slot. For example, motherboard cables are typically the largest and have many pins, while graphics card cables often end with 6 or 8 pins. To make sure you’re
plugging the right cable into the right spot, check the manual that came with your PSU. It will have a picture guide showing what each cable looks like and where it should go.
Are there any specific ways to organize the PSU cables for better airflow?
Absolutely! Good cable management helps keep your computer cool and running smoothly. You can route the cables behind the motherboard tray there’s usually space back there
just for this purpose. Keep the cables away from the main area where air flows, especially the fans. To keep them neat, you can use zip ties or velcro straps.
This not only makes your setup look clean but also prevents cables from blocking air and causing your system to heat up.
Can I reuse the cables from my old power supply with a new PSU?
It’s tempting to use old cables, but it’s not a good idea. Different PSUs can have different pin arrangements, and using the wrong cable can cause serious damage to your computer.
It’s like trying to fit a square peg in a round hole it just won’t work and might break something. Always use the cables that come with your new power supply to avoid any mishaps.
How can I test if the new power supply is functioning properly before closing the case?
Some power supplies have a self-test feature. If yours doesn’t, you can get a PSU tester tool online. This handy gadget will tell you if your power supply is working correctly without
having to put your whole computer together first. It’s a quick way to make sure everything is A-OK before you go to the trouble of assembling all the parts.
After connecting everything, what should I do before turning on the computer for the first time?
Before you hit that power button, take a moment to double check all your connections. Make sure every cable is snug and secure. Look around inside the case for any loose screws
or parts that might have been overlooked. It’s like making sure all the ingredients are in the bowl before you start baking.
What are some signs that the power supply might be faulty?
If your computer suddenly turns off, restarts on its own, or some parts don’t seem to be getting enough power, these could be signs of a power supply issue. Also, if you smell
something like burning or hear odd sounds coming from the power supply unit, it’s time to investigate. These are warning signs that something might not be right with your PSU.
My computer won’t turn on after installing the new PSU. What could be wrong?
When your computer refuses to start, it could be due to several reasons. First, ensure that all cables are correctly connected to the motherboard, storage drives, graphics card, and
PSU. If everything seems in place, try booting with only the essential components connected. This means you should have just the motherboard, CPU, RAM, and PSU plugged
in. If it still doesn’t work, resetting the CMOS might help. This is like hitting the reset button on your computer’s memory settings.
You’ll find a jumper or button on the motherboard for this purpose—check your motherboard’s manual for guidance. Also, make sure the power
button cable is properly connected to the motherboard. Sometimes, this little wire can be the culprit.
The computer seems to be running hot after a PSU upgrade. Is this normal?
It’s normal for the temperature to go up a bit if your new PSU is more powerful. But if it’s getting too hot, it might mean the cables are blocking airflow or the PSU fan isn’t working
right. Make sure your cables are tidy and not obstructing the fans. If the problem persists, the PSU might be faulty.
Should I upgrade my computer’s cooling system along with the power supply?
Consider upgrading your cooling system if you’ve added a high-performance graphics card or processor that heats up more than your old ones. If you’re experiencing overheating
even with good airflow, it’s a sign you might need better cooling. The decision depends on how much heat your new parts generate and whether your current setup can handle it.
Looking for help with PSU installation?
There are plenty of video tutorials online. Just search for “PSU installation video” and you’ll find step-by-step guides that can make the process easier to understand and follow.
Conclusion
Congratulations! You’ve successfully installed a new PSU in your PC. Now, you can enjoy a more powerful and reliable computing experience. If you encountered any
hiccups along the way, don’t worry; even the best builders face challenges. The important thing is that you persevered and came out victorious.
So, keep that screwdriver handy and remember, you’re the master of your PC’s destiny!
FAQs
Why should I upgrade my power supply (PSU)?
Upgrading your PSU can provide more power for new components, improve system stability, and ensure compatibility with modern hardware. It’s essential when you’re adding high-performance components like a powerful graphics card or additional storage drives.
How do I know which PSU is compatible with my PC?
To find a compatible PSU, consider your PC’s wattage requirements, form factor (ATX, SFX, etc.), and connector compatibility (SATA, PCIe, etc.). Consult your PC’s manual or use online PSU calculators to determine the wattage you need.
Is it necessary to wear an anti-static wrist strap while installing the PSU?
While it’s not necessary, it’s highly recommended. An anti-static wrist strap helps prevent static discharge, which can damage sensitive PC components. It’s an inexpensive precaution to protect your investment.
How do I ensure proper cable management when installing a PSU?
Proper cable management is crucial for airflow and aesthetics. Route cables neatly, use cable ties or Velcro straps to bundle them together, and avoid blocking airflow paths. This not only looks better but also helps maintain a cooler PC.
Can I reuse the cables from my old PSU with a new one?
In most cases, it’s best to use the cables provided with your new PSU, even if they look similar. Cables can have different pin configurations, voltages, and compatibility with specific PSUs, so using the wrong ones can damage your components.
What should I do if my PC doesn’t power on after installing the new PSU?
First, double-check all your connections, ensuring they are properly seated. If the issue persists, make sure the PSU’s power switch is in the “on” position. If it still doesn’t work, you may need to troubleshoot further, potentially involving your motherboard or other components.

