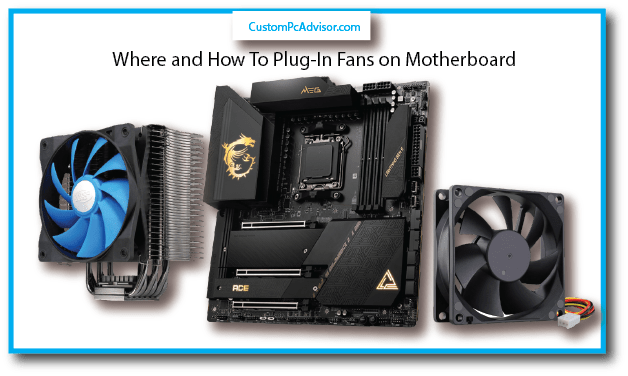
Explore the process of “Plugging-In Fans on Motherboard: Where and How” to prevent overheating in your computer. Fans are the cooling heroes in your system, similar to your
car’s cooling system. Your motherboard boasts multiple fan headers, acting like unique electrical sockets for fans. The key is choosing the correct one, much like finding the right
socket for your phone charger. For the perfect match, consult your motherboard manual to identify the ideal fan header for your specific fan type. It’s all about ensuring your
computer’s health, much like plugging in your phone charger securely.
So Where to Plug in Fans on the Motherboard?
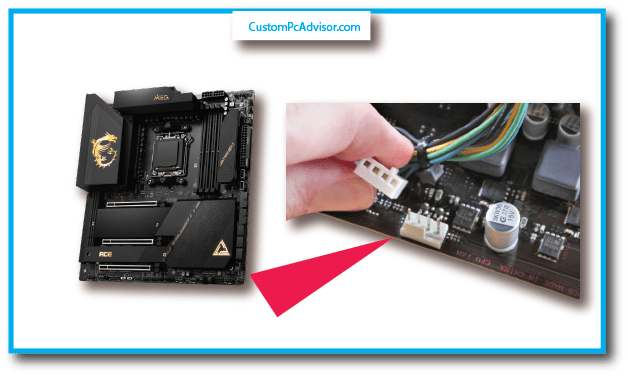
Before diving into the Fan industry please know the Types of Fans Available
Types of Fan Headers
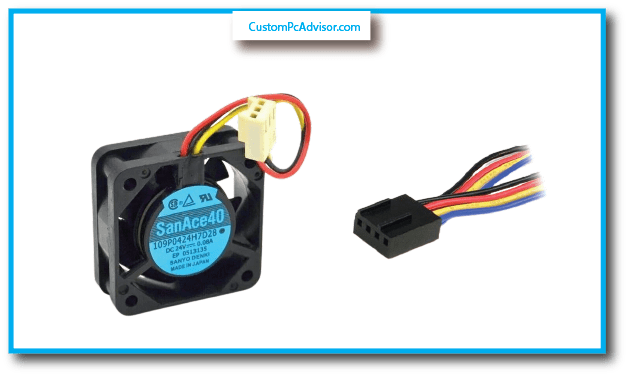
3-pin Fan Headers:
These are like the reliable old sneakers of fan headers. They provide a steady voltage to your fan, so it spins at a consistent speed, much like a faithful merry-go-round.
4-pin Fan Headers:
These are a bit fancier. They support PWM (Pulse-Width Modulation), allowing your motherboard to adjust the fan speed, kind of like a skilled conductor in an orchestra.
Finding the Fan Ports
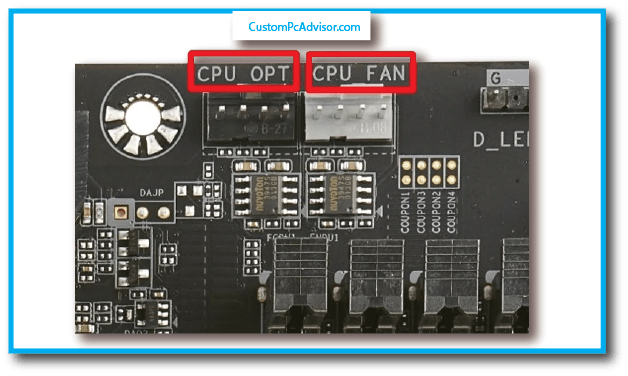
Your motherboard is like the command center of your computer, and it’s got some secret spots for your fans. Let’s discover them:
CPU Fan Header:
You’ll see it labeled as “CPU FAN” This is where your CPU’s fan belongs, keeping your processor cool while it works its magic. Think of it as your computer’s fan club.
System Fan Headers:
These are usually marked as “SYS FAN” or “CHA FAN.” They’re for cooling other parts of your computer, making sure they don’t break a sweat. Teamwork makes the dream work!
Case Fan Headers:
Look for “CHA FAN” or “CASE FAN.” These spots are perfect for fans who cool down your entire computer, like a beach breeze on a hot day.
Counting Your Fan Ports on your Motherboard
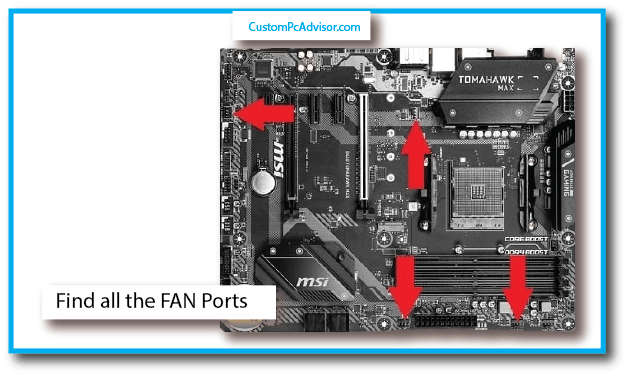
How many fan-friendly ports does your motherboard have? Well, that’s a bit of a mystery and depends on your motherboard’s personality.
You might have a few, or you could be hosting a fan extravaganza with six or more. Check the motherboard’s manual for the precise count.
Choosing the Right Place for Your Fan
Your fans come in two flavors – 3-pin and 4-pin. Here’s where they each shine:
- If you have a 4-pin fan, plug it into a 4-pin header. It’s like giving your fan cruise control – a smooth ride.
- If you’ve got a 3-pin fan, you can sneak it into either a 3-pin or 4-pin slot. But be cautious; if you put it in a 4-pin slot, it’ll go full-throttle, like a racecar driver with turbo boost.
The Art of Fan-Plugging
- Align the Pins: Match the pins on your fan’s connector with those on the fan header. It’s like finding the right key for your door, only cooler.
- Gentle Press: Gently push down until you hear that satisfying click. It’s as easy as taking a selfie.
Fan-Plugging Guide
Handle with Care:
Be gentle with those fan pins. They’re delicate, like precious twigs in a bird’s nest.
Snug Fit:
Make sure the fan connector is firmly seated in the fan header. No loose connections allowed. It’s like matching puzzle pieces.
Don’t Overload:
Most fan headers can handle two fans. Double-check your motherboard’s manual for specifics. You don’t want to throw a party the house can’t handle.
And that’s a wrap! Plugging in fans on your motherboard is a breeze – just find the right port, match the pins, and let your computer stay as cool as a cucumber on a sunny day.
Now, go forth and keep your computer chill like a pro
How Many Fans Can a Motherboard Support?
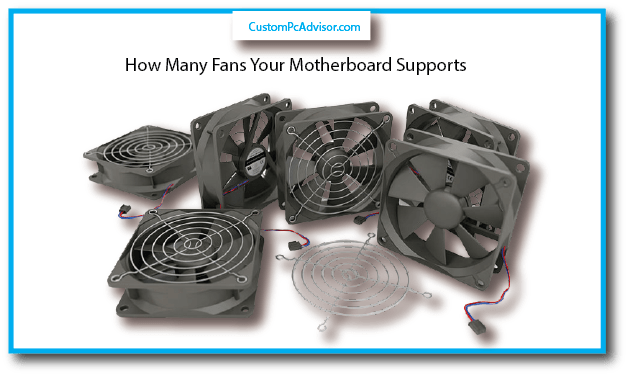
First things first: Check your motherboard’s manual or visit the manufacturer’s website. It’s like checking the recipe before baking – you need to know what your “cake” can handle.
| Fan Brand | Connection Limit | Support |
|---|---|---|
| “MegaCool 2000” | At least 3 | Up to 6 or more |
| “BreezeMaster Pro” | 3-5 | 4 or 5 |
Fan Power Requirments
Your motherboard’s got limits: Most fan headers can handle about 1 amp of power. That’s enough for around 2-4 fans, depending on their power draw. Don’t max it out; keep it cool, just like a summer drink.
| Fans | 1 Fan Header | Recommendation |
|---|---|---|
| 1-2 Fans | 👍 | Perfectly safe |
| 3-4 Fans | 🙄 | Watch that power |
Use Splitters and Hubs to the Rescue

Get more with fan friends: If you’re a fan of too many fans, use a fan hub or splitter. They’re like a fan party organizer!
| Device | Number of Fans | Power Connector |
|---|---|---|
| Fan Splitter | 2-4 | Connect to fan header |
| Fan Hub | 4+ | Connect to SATA power cable |
Fans Power Should Be Equal
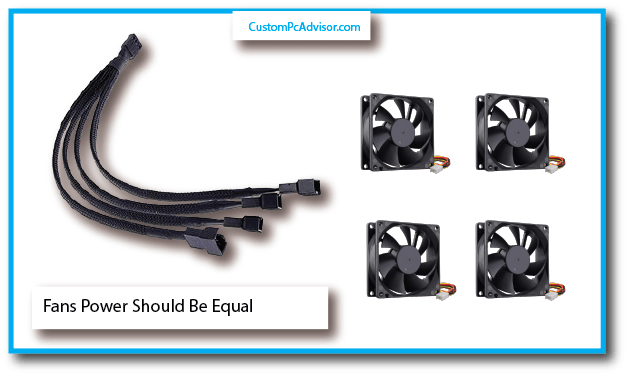
Find your fan squad:
To avoid overloading, choose fans with similar power needs. Think of it like a basketball team you want players of similar skills.
Don’t pull a power prank:
If using a splitter, ensure the total power doesn’t exceed the splitter’s rating. Safety first!
How Fan Matters
Airflow matters: Arrange your fans to create a cool breeze inside your case. This way, your PC stays Cool, just like an ice cream truck on a hot day.
Read Your Motherboard Manual Fan Support
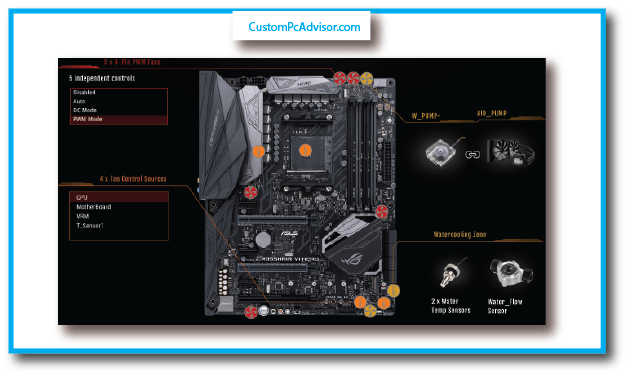
RTFM:- (Read The Fine Manual)
Read the fine manual. Your motherboard manual has your back. If you’re still puzzled, reach out to the motherboard manufacturer. They’re the customer support champs.
There you have it, the fantastic guide to keeping your PC cool and happy. Don’t fan-realize, and you’ll be on the road to a breezy computing experience! 😉🌬️💨
How To Plug-In All Fans on the Motherboard?
Imagine you’re about to embark on an epic quest – plugging in all your fans onto the motherboard.
Think of it as connecting the stars of your computer’s coolness show. Grab a seat; I’ve set up a cozy table for us:
Case Fan Connection
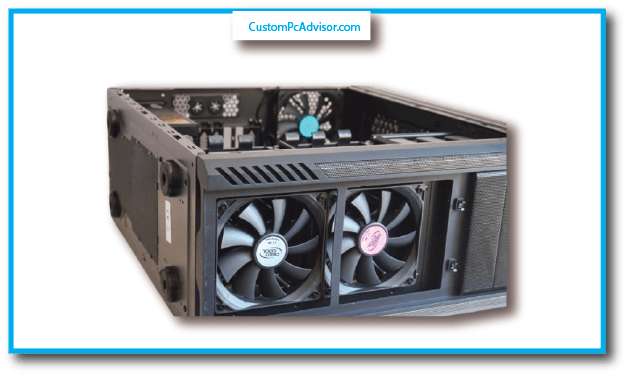
Connecting Case Fans to Your Motherboard:
- First, find the fan connectors on your motherboard, usually near the CPU area.
- Pick either SYS FAN or Case FAN for your case fan.
- Match the pins on your fan’s plug to the ones on the motherboard.
- Gently plug it in until it clicks.
Using Fan Splitters:
- If you have lots of case fans, you can use a fan splitter.
- Think of it as a cable with one ‘male’ end (the plug) and two ‘female’ ends (the slots).
- Plug the ‘male’ end into the motherboard’s fan connector.
- Attach the ‘female’ end to your case fans.
- Just make sure it can handle all your fans and the power they need.
Configuring Fan Speed in the BIOS or UEFI:
- When you turn on your computer, press a special key (like F2 or Delete) to enter the BIOS or UEFI.
- Look around in the menu for something like “fan settings.”
- You can then adjust how fast or slow each fan goes.
Now you’re ready to keep your computer cool without needing a tech wizard’s handbook! 😊🌬️
CPU Cooler Fan Connection
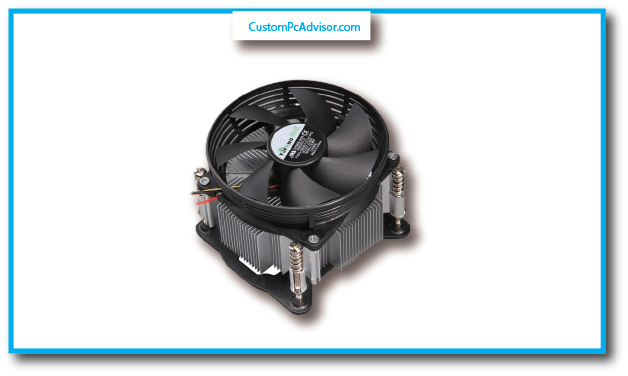
Find the Right Spot:
Look for the CPU FAN placed on your motherboard. It’s usually near the computer brain (CPU) and labeled as CPU FAN.
Match the Pins:
Your CPU cooler fan has pins. They should fit into the CPU FAN place like connecting puzzle pieces.
Gentle Connection: Carefully plug the fan into the CPU FAN place. It should go in smoothly, like sliding a key into a lock. No need to push hard.
Extra for 4-Pin Fans:
If your fan has four pins, there’s a bonus. Connect the PWM cable to let the computer control the fan’s speed.
Find the PWM spot on the motherboard, often near the CPU FAN, and label it as PWM FAN.
Lock in the Speed:
Just like before, plug the PWM cable into the PWM spot. It’s like connecting your headphones for good sound, firm but not too hard.
Quick extra Tips for you
- If the fan connector doesn’t fit, don’t force it. Try aligning it gently.
- For 4-pin fans, remember to attach the PWM cable.
- Later on, you can adjust the fan’s speed in your computer settings. It’s like setting your radio to the right volume.
Power Supply Fan Connection
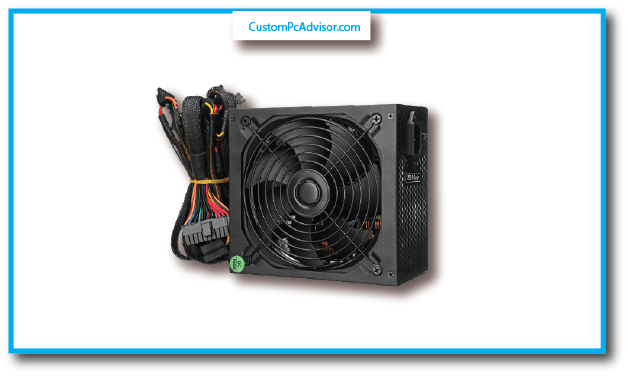
Now here are the steps to Connect Powerpply FAns Connections make sure to Follow every Step in order to get the Fan Connection
| Step | What to Do |
|---|---|
| 1. | Find the Spot |
| 2. | Know Your Plug |
| 3. | Plug It Right |
| 4. | The 4-Pin Twist |
Step 1: Finding the Spot
Imagine your motherboard as a giant puzzle, and we need to find the perfect spot for your fan to plug in.
This spot is usually called SYS FAN. It’s like finding the right key to your treasure chest.
Step 2: Know Your Plug
Now, let’s talk about your fan’s plug. It’s either a 3-pin or a 4-pin connector – it’s just a matter of counting those little metal prongs.
Imagine them as the teeth of a comb three or four, that’s the question!
Step 3: Plug It Right
Your motherboard’s SYS FAN spot has its own set of pins. It’s like a jigsaw puzzle; you need to make your fan’s pins fit perfectly.
Just like connecting puzzle pieces, you need to line them up right, and then give it a gentle push to make it snug – no brute force needed.
Step 4: The 4-Pin Twist
For those of you with a 4-pin fan, there’s a little bonus round. You also need to locate something called a PWM header on your motherboard.
This is where your fan’s special cable goes. Think of it as a secret handshake; you need to match the moves perfectly.
GPU Fan Connection
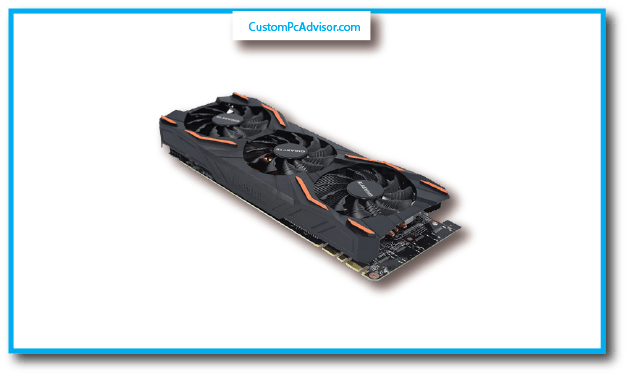
now these are the steps for Connecting The GPU is very easy as well
Step 1: Know Your Fan and Motherboard
Let’s not charge into battle blindly. Take a moment to inspect your GPU fan – does it sport a 3-pin or 4-pin connector? This knowledge is power! Now, scout your motherboard for a
dedicated GPU fan header. It usually goes by the name GPU FAN or VGA FAN. If your motherboard is lacking such a VIP section, fret not; the trusty SYS FAN header will do the trick.
Step 2: The Perfect Alignment
Like a knight fitting into his armor, your GPU fan connector must align perfectly with the motherboard’s fan header.
Those little pins on the fan connector should sync up sweetly with their counterparts on the header.
Step 3: The Magical Click
Gently press down on the fan connector. No need to summon your inner Hulk; it should slide in without a fuss. If it resists,
just recheck that alignment, like a jigsaw puzzle piece that’s almost there.
Step 4: The 4-Pin Fan’s Secret Weapon
Behold the mystical 4-pin fan! It has a little extra cable called PWM (Pulse Width Modulation). This is like a magical tether between your motherboard and the fan to control its speed.
Look for the PWM header, usually loitering near the GPU fan header, marked as PWM FAN.
Step 5: Embrace the PWM Power
Align the PWM cable connector with the PWM header, and with a gentle press, it should lock into place. This allows your motherboard to whisper sweet speed commands to your fan.
Pro Tips for the Brave Knight (You)
- Double-check that connector alignment. Precision is your armor!
- No need for brute force; just finesse that connector in. A few wiggles won’t hurt.
- Don’t forget the 4-pin fan’s secret sauce, the PWM cable. It’s like the cherry on top of your cooling sundae!
- After this quest, venture into your BIOS or UEFI to tweak your GPU fan’s speed to your liking.
Mistakes To Avoid While Connecting Fans to the Motherboard
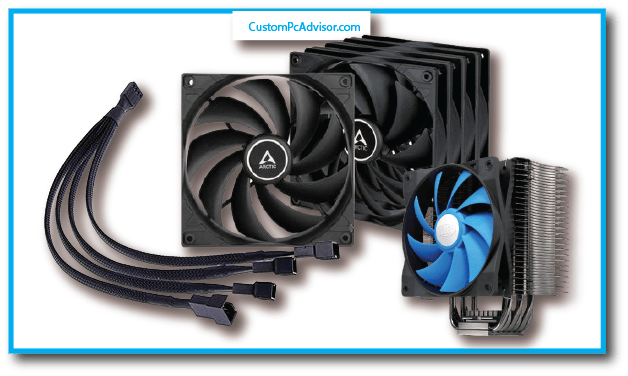
Now this is the last Case of things that you need to avoid to work everything perfect
Right, Fan Right Header:
Your motherboard is like the conductor of the fan orchestra, and it has different headers for different types of fans – think CPU fans, system fans, and even pump fans.
To hit the right note, consult your motherboard manual to match fans with their respective headers.
Avoid Fan Overload:
Don’t be tempted to create a fan frenzy by connecting too many fans to a single header. Check your motherboard’s manual to find out how many fans each header can handle.
Overloading a header is like throwing a party and tripping the circuit breaker – it’s not fun and can damage your motherboard.
Airflow in the Right Direction:
Fans are picky about where they blow. Always look for the directional arrow on the fan.
It’s like the compass for your fans – follow it to make sure they’re blowing air in the case in the right direction, not making your components hot under the collar.
Use the Right Screws:
Fan screws are like the Cinderella of the screw world; they’re smaller, but they’re a perfect fit for fans.
Using the wrong screws is like trying to put on Cinderella’s glass slipper on the ugly stepsister – it just won’t work and might damage your fan headers.
Plug It All the Way:
Don’t be shy; push those fan cables into the motherboard headers. Loose connections are like having a wobbly table – things won’t work properly, and it could lead to an electronic disaster.
Where are the fan connectors on my motherboard?
You can find fan connectors along the sides of your motherboard. They look like small blocks with several metal pins sticking out, usually encased in plastic. These connectors
are marked with labels such as CPU FAN for the fan that cools down your CPU (the brain of your computer) or SYS FAN for other fans inside your computer case that helps keep everything cool.
What do the fan connector labels (CPU FAN SYS FAN) mean?
These labels tell you where to connect the different fans. The CPU_FAN label is for the connector that powers the fan on top of your CPU, which prevents it from overheating.
The SYSTEM FAN label is for connectors that power the other fans in your computer, which move hot air out and pull cool air in to maintain a good temperature inside.
Can I plug any fan into any connector on the motherboard?
Most of the time, yes. Fans and connectors have pins, and as long as the number of pins matches up, you can connect them.
For example, a fan with three pins can be plugged into a connector with three pins.
What if my fan connector has 3 pins and the motherboard slot has 4?
That’s okay! A fan with three pins can still be connected to a motherboard slot with four pins.
The extra pin on the motherboard is for controlling the fan’s speed, but if your fan doesn’t have that fourth pin, it will just run at one speed all the time.
What if my fan connector has 4 pins and the motherboard slot has 3?
This situation is a bit more complicated. If you try to connect a four-pin fan into a three-pin slot, the fan might not work as expected.
It’s better to match the fan’s pins with the connector’s pins, or you can use a special cable that lets you connect them properly.
Are there different types of fans for computers?
Yes, there are many types! Some fans cool down the CPU, others are for the case, and some even have colorful lights (called RGB fans).
What’s the difference between a 3-pin and a 4-pin fan?
The main difference is that a four-pin fan can have its speed changed. This means you can make it run slower when your computer isn’t doing much, which makes it quieter.
Can I control the speed of my fans?
Whether you can control your fan speed depends on what motherboard you have and what kind of fan it is. You can usually change the speed settings in the BIOS
(this is like the settings menu when your computer first turns on) or with special software from the company that made your motherboard.
How do I adjust the fan speed on my computer?
To change how fast your fans spin, you’ll need to look at the manual for your computer or visit the website of your motherboard’s manufacturer.
They’ll have instructions on how to get into the BIOS or use their software to adjust the fan speeds.
Does the type of fan connector affect fan speed control?
Yes, it does. A four-pin connector gives you more options to control the fan speed than a three-pin connector does.
I have more fans than fan connectors on my motherboard. What can I do?
If you’ve got more fans than places to plug them in on your motherboard, don’t worry! You can use a fan splitter.
This handy little cable lets you connect one fan connector on your motherboard to several fans.
What is a fan splitter and how does it work?
Imagine a fan splitter as a power strip for your fans. Just like a power strip lets you plug multiple appliances into one outlet, a fan splitter
lets you connect several fans to one connector on your motherboard.
Is it safe to connect multiple fans to one splitter?
Yes, it’s usually safe. But make sure the combined power needed by all the fans doesn’t go over what the splitter and the motherboard connector can handle.
It’s like making sure you don’t plug in too many gadgets into one power strip.
Where does the power for the fans come from?
The power for the fans comes from your computer’s power supply unit (PSU), which is like the heart pumping electricity to all parts of your computer.
Do I need to connect the fans to the power supply unit (PSU) too?
Most of the time, your fans will get power just from being connected to the motherboard. But if you have a really strong fan, it might need to be plugged directly into the PSU.
Safety and Troubleshooting
What happens if I plug a fan in the wrong way?
If you accidentally plug a fan in backward, it usually just won’t start. It’s like putting batteries in the wrong way in a remote control.
Always double-check the instructions to make sure you’re plugging it in correctly.
My fan isn’t spinning. What could be wrong?
If your fan isn’t moving, it could be broken, not plugged in right, or the place where it plugs into the motherboard isn’t working.
Make sure everything’s connected properly, and if it’s still not working, look at your motherboard’s manual to figure out what to do next.
How can I tell if my computer fans are working properly?
You can listen to the sound of the fans or feel for air coming out of the vents. If your computer is getting too hot,
like if it feels hot to the touch or shows high temperatures on a monitoring program, then your fans might not be doing their job.
Is it okay for my computer fans to make noise?
It’s normal for fans to make some noise, especially when they’re working hard to cool down your computer.
But if they’re really loud or sound like they’re struggling, it might be time to get new fans.
Should I keep my computer case open for better cooling?
Keeping your case open might help with airflow, but it also lets in dust that can mess up your computer.
It’s usually better to keep it closed and make sure your fans are clean and working well to keep everything cool.
What is a fan splitter and how does it work?
Imagine a fan splitter as a power strip for your fans. Just like a power strip lets you plug multiple appliances into one outlet,
a fan splitter lets you connect several fans to one connector on your motherboard.
Is it safe to connect multiple fans to one splitter?
Yes, it’s usually safe. But make sure the combined power needed by all the fans doesn’t go over what the splitter and the motherboard connector can handle.
It’s like making sure you don’t plug in too many gadgets into one power strip.
Where does the power for the fans come from?
The power for the fans comes from your computer’s power supply unit (PSU), which is like the heart pumping electricity to all parts of your computer.
Do I need to connect the fans to the power supply unit (PSU) too?
Most of the time, your fans will get power just from being connected to the motherboard. But if you have a really strong fan, it might need to be plugged directly into the PSU.
Safety and Troubleshooting
What happens if I plug a fan in the wrong way?
If you accidentally plug a fan in backward, it usually just won’t start. It’s like putting batteries in the wrong way in a remote control.
Always double-check the instructions to make sure you’re plugging it in correctly.
My fan isn’t spinning. What could be wrong?
If your fan isn’t moving, it could be broken, not plugged in right, or the place where it plugs into the motherboard isn’t working.
Make sure everything’s connected properly, and if it’s still not working, look at your motherboard’s manual to figure out what to do next.
How can I tell if my computer fans are working properly?
You can listen to the sound of the fans or feel for air coming out of the vents. If your computer is getting too hot,
like if it feels hot to the touch or shows high temperatures on a monitoring program, then your fans might not be doing their job.
Is it okay for my computer fans to make noise?
It’s normal for fans to make some noise, especially when they’re working hard to cool down your computer.
But if they’re really loud or sound like they’re struggling, it might be time to get new fans.
Should I keep my computer case open for better cooling?
Keeping your case open might help with airflow, but it also lets in dust that can mess up your computer.
It’s usually better to keep it closed and make sure your fans are clean and working well to keep everything cool.
And there you have it! A simplified guide to managing your computer’s fans and what to do if you run into any issues. If you need more help or have other questions, just let me know!
Conclusion
now its time for the final words connection fans to your motherbaord is not a rocket science this is very easy all you need to conside is that you know all the right Fans
Pins on the right place and yes there you go its all done also there are few Fans or mabye Ports like older generation
that may not support but mostly motherboard Have all the Important fans Connections
FAQs
Do all motherboards support PWM fans?
No, not all motherboards support PWM (4-pin) fans. Some motherboards have 3-pin fan headers, which support voltage control instead of PWM.
Can I daisy chain multiple fans on one header?
You can use fan splitters or hubs to connect multiple fans to a single motherboard header, but be mindful of the total power draw and ensure it doesn’t exceed the header’s capacity.
How can I control fan speeds?
You can usually control fan speeds in the BIOS/UEFI settings or by using software like SpeedFan or motherboard-specific software.
What happens if I connect a fan in the wrong direction?
Reversing the fan’s direction won’t damage it, but it will affect cooling efficiency. Ensure the fan blows air in the intended direction (usually from front to back).
Should I use static pressure or airflow fans for radiators and heatsinks?
It depends on your cooling needs. Static pressure fans are better for restrictive environments like radiators, while airflow fans are more suitable for general case cooling.

